Search This Blog

Sunday, April 29, 2012

1/72 Italeri Church - wip Part 2: The Roof

(please scroll down for progress report)

I received my Plastruct HO-scale Spanish roof tiles (PS-122) yesterday. Huzzah!

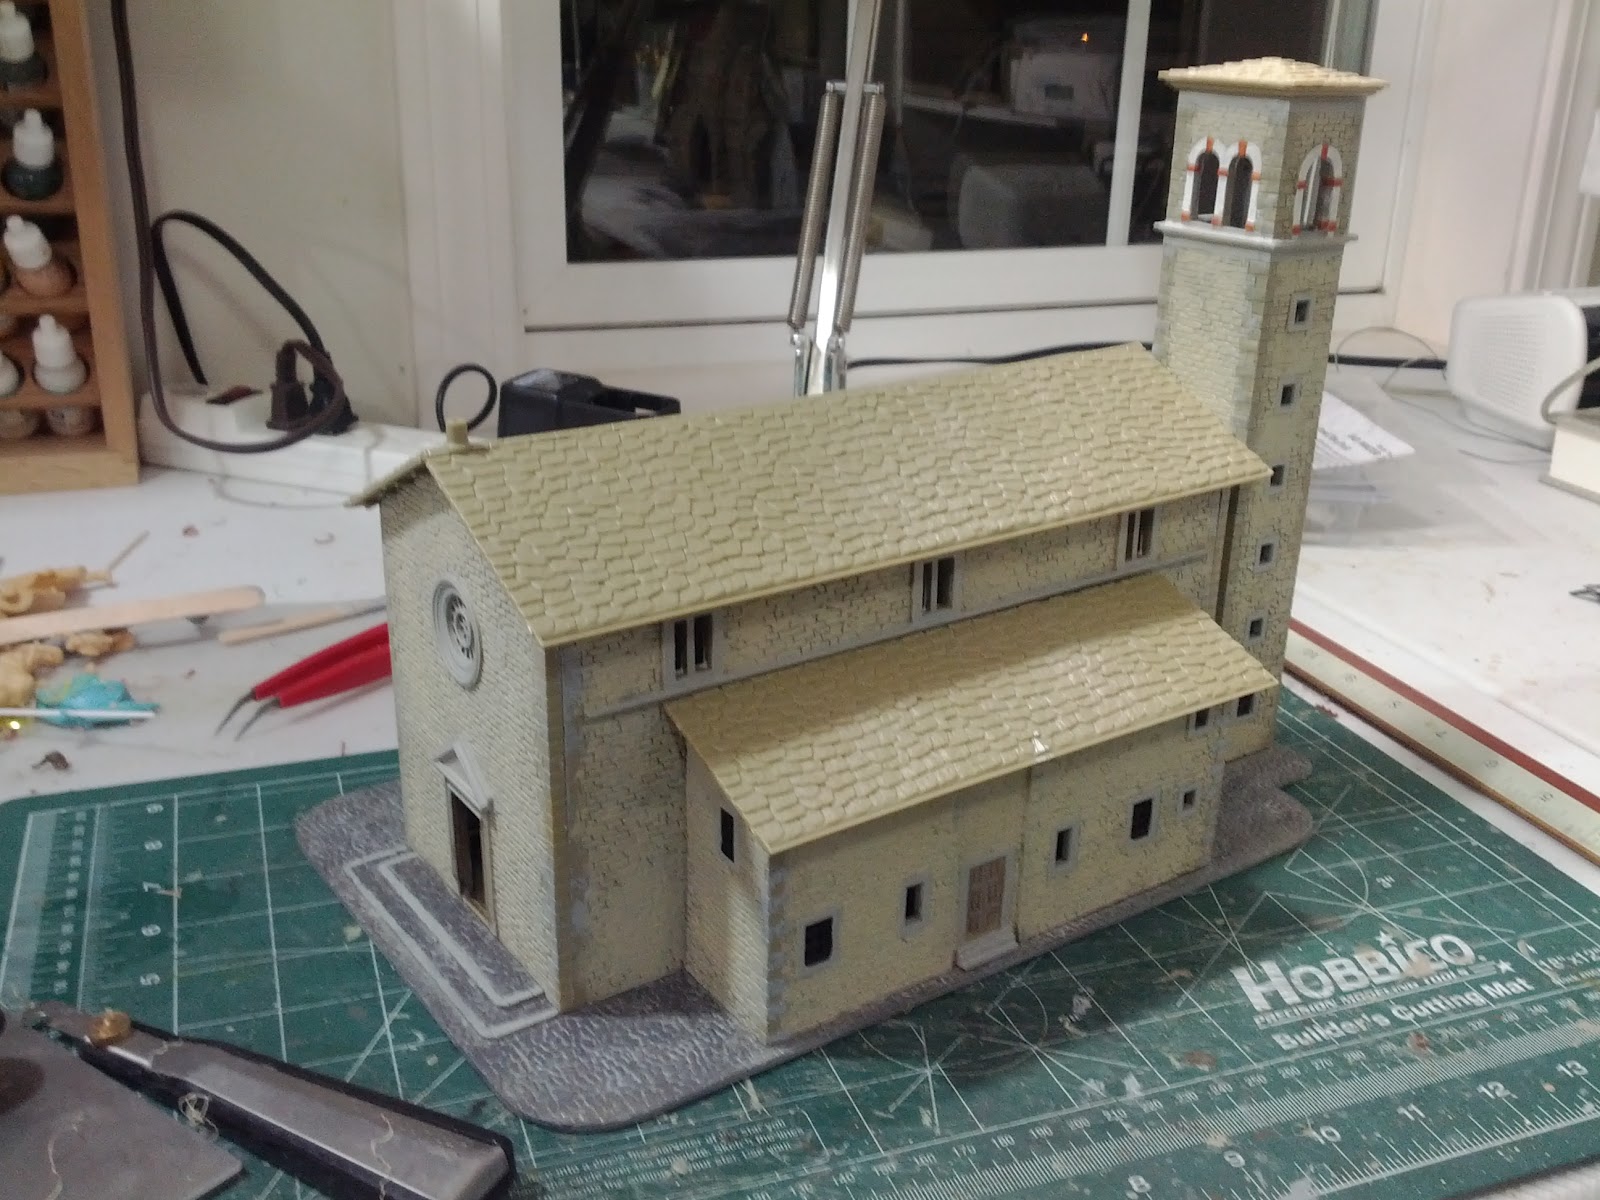
I wanted to dry fit them on the Italeri church, side by side with some of the original slate roofing, so I can see whether they give the right look. You can see some comparison shots below.

The Plastruct sheet is not wide enough to to cover the entire main roof. But the apparent joints on the photos will disappear once the sheets are glued down and painted.  I am still undecided as to whether I should extend the roof tiles to cover the bottom where Italeri has moulded in roof gutters (but not down spouts).

Finally, I invited an expert to check out my new roof. She gave it a good sniff and seemed to approve of the change.


I may put these same Plastruct sheets on my Shell Hole Scenics church as well.  I think they look good but it is rather maddening since I spent an hour plus earlier cleaning up resin bubbles and pinholes just on the roof piece!


Just to please Ray who has been skeptical of my fussing over the roof, I made new ones using cellular foamboard, to which I added internal supports, so that I can put the tile sheets on them without using up the original parts. I can now save the slate rooftop as an alternative and have two different looks for the church!

Progress so far....

Friday, April 27, 2012

Siamese in Angkor, wip

Can't resist posing these together.  Will post better and more photos later as my project progresses; these are just teasers.


Tuesday, April 24, 2012

1/72 Italeri Church - wip

I finally decided to purchase this fine church model despite already having several churches in my collection. Once I received it in the post over the weekend, I had to start on it even though there are many other projects ahead of it in my work queue. This is the state of progress on Day 2.

The most time-consuming task has been filling and re-scribing the cornerstones after joining the walls together. I have only done this so far for the bell tower and the smaller side structure. The main walls have not yet been glued together as I plan to add some "printed" frescoes and the like to the interior walls first.  I have also added some windows and steel bars to some of the window apertures (they are hard to make out in the photos).

I am rather unhappy with how the "slate roofs" that come with the model look. The individual slates are impossibly large in size and the overall effect is less than convincing to my eyes. I plan to replace the roofing material with a sheet of HO scale Spanish tiles that I just ordered from HobbyLinc.com.


Not much by way of progress... still waiting for the roof tiles to come. Just better pictures since I took these with a proper camera rather than a phone.


Saturday, April 21, 2012

Khmer Monument


As I still do not have any scenery or building that would be appropriate for Siam (Ayutthaya) at the moment, I have to fall back on an Angkor-Wat inspired piece. This is an aquarium decoration representation of the Angkor Thom Gate that I happen to have in my stash. It won't work for Siamese battles of course but will at least be appropriate for the Siamese campaigns against the Khmer.


Compare the photo above of the real thing and those below where I added some small "forest elephants" and a 1/72 figure to show the scale of the model. Based on the relative size of the human figures, I believe the aquarium decoration to be about 1/144 in scale. Even so, the model still has quite a commanding presence for 1/72 even at half its actual dimension.

So far I have only modified the piece by drybrushing it with a tan/mud color. I will put in still more weathering and highlights later on.


First weathering step done...

Tuesday, April 17, 2012

25mm or 1/72 Three-Arch Stone Bridge


Made by Hudson & Allen, this sizable bridge model is 20 inches long. It is nicely cast in foam resin. I had to hollow out the foam resin from underneath the arches but otherwise the model comes in one piece and is already ready for primer and paint.

I sprayed a grey automotive primer on first. Then I dry-brushed the cobblestones in dark grey, the stones in mud and light grey, and painted the area under the arches in green black. The whole painting process took about 15 mins, which is as close to instant gratification as I can ever hope for. I may still want to seal with a matte varnish and then weather/wash with some oils. If I am truly ambitious, I will even paint in variegated stone colors as well (I may experiment with using oil washes for this).

The two tallish 1/72 figures in the picture show just how large and long the bridge is. It will certainly work for larger (28mm) figures as well.


Monday, April 16, 2012

Siamese Army and Elephants - minor updates


I will be using some of the rather small first-issue HäT 1/72 Indian elephants as forest elephants for my"tribal troops."  These will carry a mahout and two archers each (and no howdah).

I am resculpting the ears and replacing the tusks with tapered styrene rods. I will also redo the tails on some of them.

For size comparison, see one of these smaller elephants next to one of the proper Hät Indian elephants.


The elephant parasol in progress.... and further below is a command group for the tribal levies.


Friday, April 6, 2012

Siamese Elephants - the first painted stage

Siamese elephants, just now base painted.

I will need to paint in the textile designs for the cloth and, of course, add figures and superstructure...


Wednesday, April 4, 2012

Indian maiden guard figures compared

As I begin to build my Siamese army, I wonder whether I should not also think about a Khmer army (of an earlier period) as well. If I do go ahead I might just paint up Newline Designs and HäT Indian figures as Khmers. The Khmers had a maiden guard and I wonder whether I can use the Indian ones... perhaps with head swaps?

HäT 1/72 (left) and Newline Designs 20mm (center and right):


Siamese Elephants... just getting started

The HäT 1/72 elephants arrived in the mail today. I have 9 total now but I think I will only turn 3 into Siamese war elephants.

I slightly bent the trunks, tusks and tails in hot water and fixed the new shapes with an ice-bath. I drilled the heads and torsos and connected them with thick copper rods instead of the molded pegs. This allowed me to position the heads in a way that is more pleasing to my eyes at least. After some more trimming and applying putty, they are now ready to receive the crew and superstructure. Well, it's a start anyway...