Search This Blog

Showing posts with label buildings. Show all posts

Saturday, May 12, 2012

1/72 Churches WIP - yet further updates


1/72 Italeri Church ... the 2 bell tower roofs (terracotta vs. slate) compared. The one on Right is made from original kit parts and that on Left is what I scratched built with balsa, plastic roof tiles sheets, epoxy putty and plastic miniature bells. 

I may have to build another new roof along the same lines since the current one was made in haste and is therefore somewhat shoddy (edges not quite square). 

Below are the two mounted on the bell tower.  I didn't think the original roof has enough pitch and think that the new one is a little better on that score at least.


Italeri Church: alternate roof made from mounting card.  Version Mk. I that I made with celluloid foamcore was far too thick, which makes the side roof very difficult to fit on. The thick card one is just right thickness-wise and once I have stabilized the warpage I will mount the plastic roof tiles sheets on.


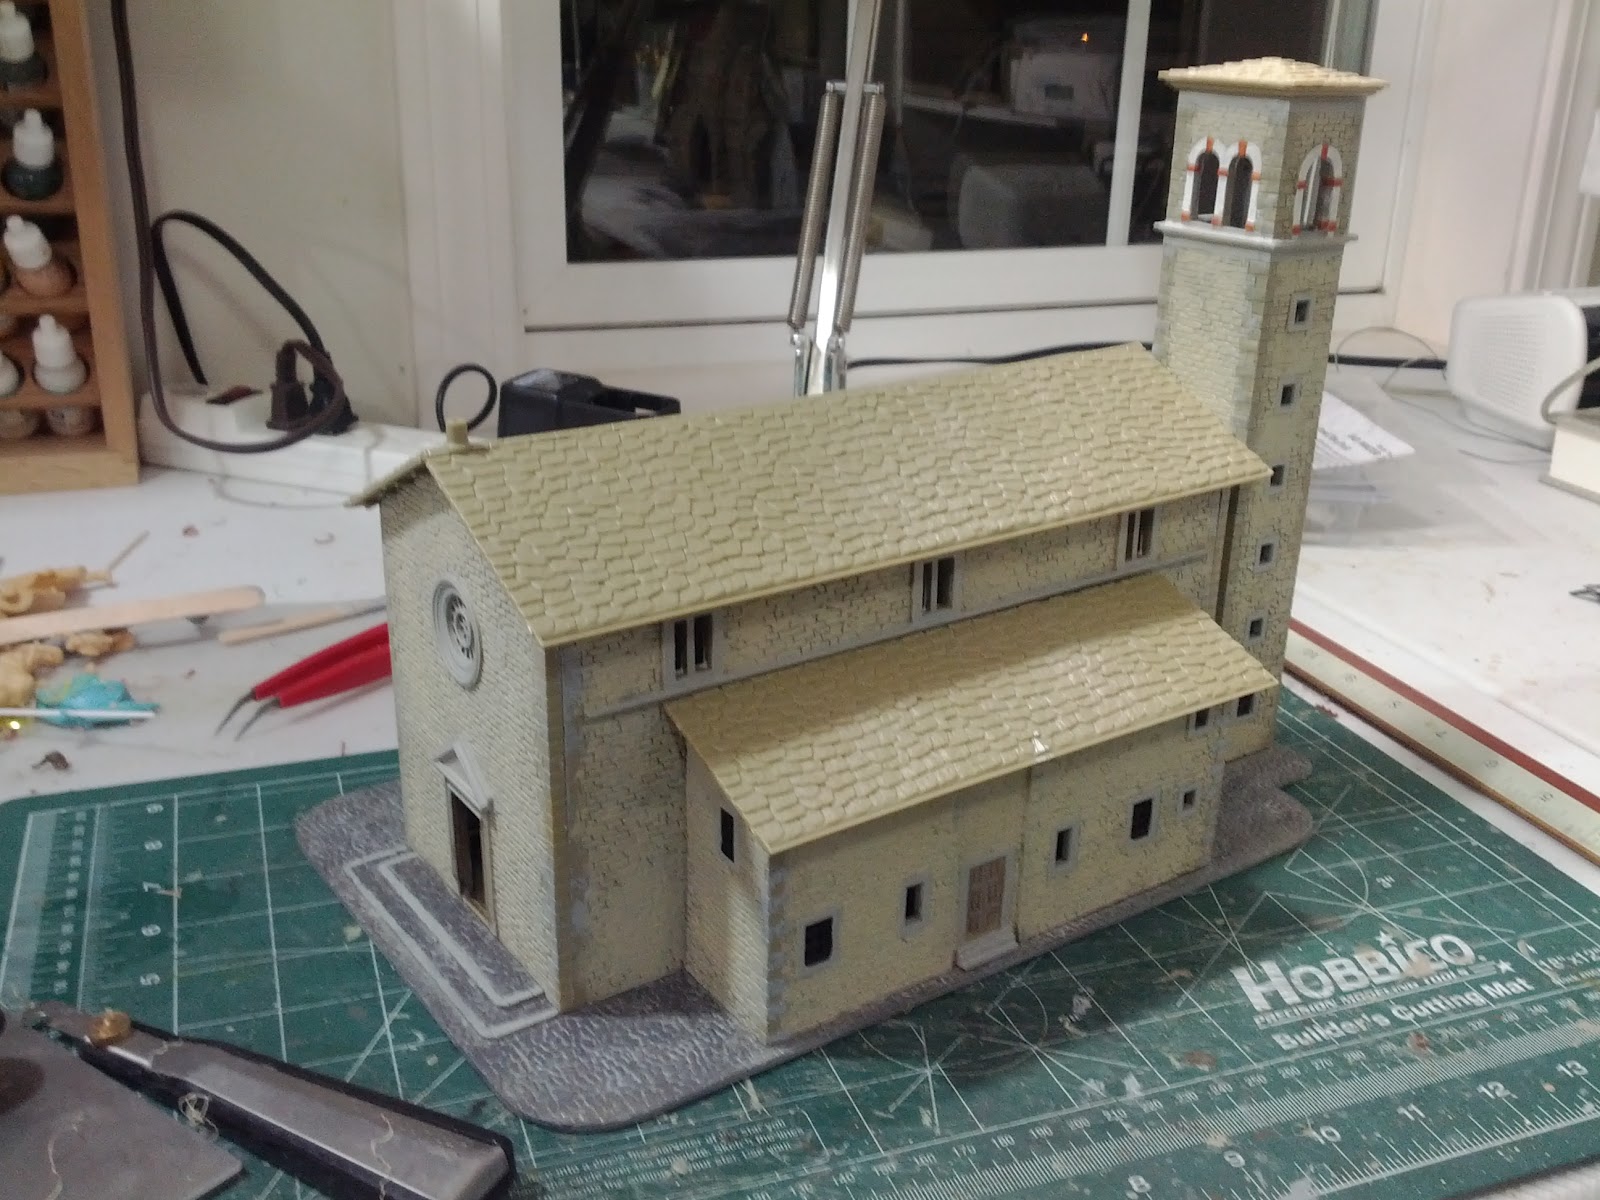
Mediterranean Church Progress ( photo colors are more vivid than in real life):
1. Started work on the tower.
2. Scratched another gallery using foamcore, tamiya masking tape and toothpicks, as the resin original is somewhat lacking.
3. Started painting on the one-piece terrain base and church crypt/basement. The painting on the basement/crypt may be a little too cartoonish now.


Saturday, May 5, 2012

WIP 1/72 churches - updates and interior shots

Here are some further shots of the Italeri church and the SHS Mediterranean church. You can see the various parts that make up the SHS church and the interior of the Italeri church in its current state.

One thing I should probably say is that while the SHS church is looking quite nice now it's a bit of a horror in terms of clean up and preparation. The resin of the model I have is filled with bubbles and pinholes; it is also quite brittle and already broken off in some places. I have had to use styrene bits to reconstitute some of the windows, for instance.

Next I will try to deck out the SHS church with icons and frescoes and generally make the interior look pretty.

I also threw in a picture of all the small ruined pieces together.

Sorry for being such a crappy photographer. I am lucky to have a very nice Nikon Digital SLR but still can't take photos that are worth anything! :-(


Friday, May 4, 2012

20mm Mediterranean Church WIP

Working on the Italeri church model has inspired me to to start on painting other church models that I have collected over the years.  Here is the current progress on my 20mm Shell Hole Scenics Mediterranean church.

The resin model consists of:
- a large base representing the church's foundation walls and an underground crypt, an exterior stone wall and lots and lots of stairs
- the main church structure (this can be used alone or with the base and tower)
- 3 roof pieces
- a tower in 2 pieces
- some interior bits representing a balcony and pulpit.


The tower still needs lots of work. I am considering adding a section to the middle to raise the tower's overall height. With the pictured addition, the SHS tower will be just as tall as the Italeri church bell tower.

Two ruined wall corners for WWII, 1/72

This is a nice pair of ruin wall corners. They represent improvised strong points that were built around the hull and engine of a destroyed T-34.


Hovels 1/72 Industrial Chimney, WIP

This is a nice two piece model of  a collapsed industrial chimney. I wish there is a third piece that represents the middle part of the broken chimney. Maybe I will be inspired to make one myself later on.


Sunday, April 29, 2012

1/72 Italeri Church - wip Part 2: The Roof

(please scroll down for progress report)

I received my Plastruct HO-scale Spanish roof tiles (PS-122) yesterday. Huzzah!

I wanted to dry fit them on the Italeri church, side by side with some of the original slate roofing, so I can see whether they give the right look. You can see some comparison shots below.

The Plastruct sheet is not wide enough to to cover the entire main roof. But the apparent joints on the photos will disappear once the sheets are glued down and painted.  I am still undecided as to whether I should extend the roof tiles to cover the bottom where Italeri has moulded in roof gutters (but not down spouts).

Finally, I invited an expert to check out my new roof. She gave it a good sniff and seemed to approve of the change.


I may put these same Plastruct sheets on my Shell Hole Scenics church as well.  I think they look good but it is rather maddening since I spent an hour plus earlier cleaning up resin bubbles and pinholes just on the roof piece!


Just to please Ray who has been skeptical of my fussing over the roof, I made new ones using cellular foamboard, to which I added internal supports, so that I can put the tile sheets on them without using up the original parts. I can now save the slate rooftop as an alternative and have two different looks for the church!

Progress so far....

Friday, April 27, 2012

Siamese in Angkor, wip

Can't resist posing these together.  Will post better and more photos later as my project progresses; these are just teasers.


Tuesday, April 24, 2012

1/72 Italeri Church - wip

I finally decided to purchase this fine church model despite already having several churches in my collection. Once I received it in the post over the weekend, I had to start on it even though there are many other projects ahead of it in my work queue. This is the state of progress on Day 2.

The most time-consuming task has been filling and re-scribing the cornerstones after joining the walls together. I have only done this so far for the bell tower and the smaller side structure. The main walls have not yet been glued together as I plan to add some "printed" frescoes and the like to the interior walls first.  I have also added some windows and steel bars to some of the window apertures (they are hard to make out in the photos).

I am rather unhappy with how the "slate roofs" that come with the model look. The individual slates are impossibly large in size and the overall effect is less than convincing to my eyes. I plan to replace the roofing material with a sheet of HO scale Spanish tiles that I just ordered from HobbyLinc.com.


Not much by way of progress... still waiting for the roof tiles to come. Just better pictures since I took these with a proper camera rather than a phone.


Saturday, April 21, 2012

Khmer Monument


As I still do not have any scenery or building that would be appropriate for Siam (Ayutthaya) at the moment, I have to fall back on an Angkor-Wat inspired piece. This is an aquarium decoration representation of the Angkor Thom Gate that I happen to have in my stash. It won't work for Siamese battles of course but will at least be appropriate for the Siamese campaigns against the Khmer.


Compare the photo above of the real thing and those below where I added some small "forest elephants" and a 1/72 figure to show the scale of the model. Based on the relative size of the human figures, I believe the aquarium decoration to be about 1/144 in scale. Even so, the model still has quite a commanding presence for 1/72 even at half its actual dimension.

So far I have only modified the piece by drybrushing it with a tan/mud color. I will put in still more weathering and highlights later on.


First weathering step done...